
What this guide covers
Qrtr checks your documents against the requirements they are supposed to meet, then gives you a scored report of what's missing or wrong. This guide takes you from your first sign-in to a completed Qrtr Check, using the shortcuts built into the Home page.
By the end you will have created a project, run a check on a document, and know where to find your results.
Before you start
You'll need a Qrtr account and an invitation to an organisation. You'll also want two things ready: the document you want checked, and the document that defines what it has to comply with — a proposal, statement of work, engagement letter, audit protocol or terms of reference. Qrtr can run without that second document, but the results are far more useful with it. Documents can be PDF or DOCX (i.e. Word).
Understanding the Home page
First use
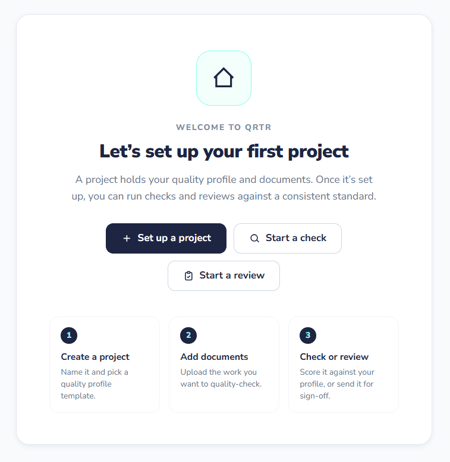
The very first time you log in the greeting panel you are prompted to:
Set up a project creates a workspace holding a quality profile and your documents.
Start a check scores a document against its project's quality profile and returns an issue report. Start a review sends a document to a person for human review and sign-off.
Subsequent use
The next time you log in you get the standard homepage.
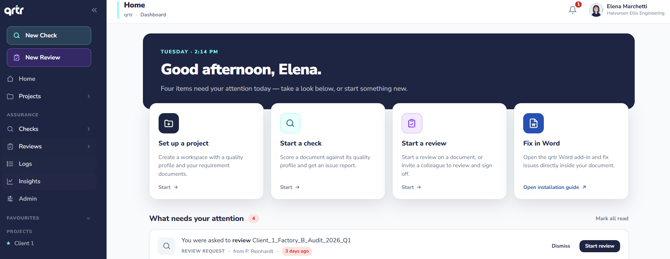
The greeting panel at the top tells you how many items are waiting on you today. Directly beneath it are three cards that cover everything a new user needs:
Set up a project creates a workspace holding a quality profile and your requirement documents. Start a check scores a document against its project's quality profile and returns an issue report. Start a review sends a document to a person for human review and sign-off.
Below the cards, What needs your attention is your queue. It mixes review requests assigned to you with check results sitting in a provisional state awaiting your approval. Each row has a Dismiss link and an action button — Start review or View report — and Mark all read clears the whole list. Further down, Your recent activity lists the checks and reviews you touched most recently so you can pick up where you left off.
Two shortcuts live permanently at the top of the left navigation: New Check and New Review. They open exactly the same wizards as the Home page cards, from anywhere in the app.
Step 1: Set up a project
A project is the container for your work. It holds your requirement documents and the quality profile — the settings that decide how strictly documents are scored and who has to sign off.
On the Home page, click Start on the Set up a project card. The Create new project wizard opens with three steps: Project details, Add documents, and Quality profile.
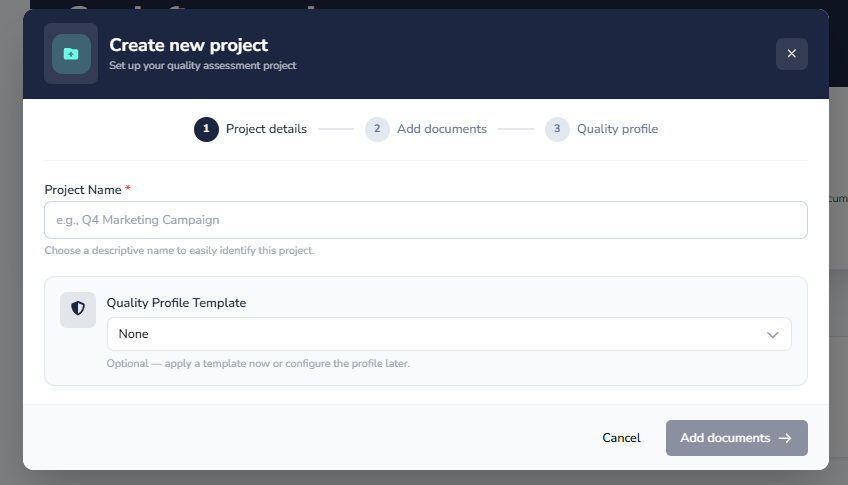
Give the project a descriptive name — something you'll recognise in a list months from now, like the client, engagement or deliverable. If your organisation has already built quality profile templates, choose one from the Quality Profile Template dropdown to apply its settings immediately. This is optional; leaving it as None lets you configure the profile yourself in step 3, or later from the project.
Click Add documents to continue.
Step 2: Add your documents
Step 2 has two upload areas, both optional, and the distinction between them matters.
Requirement documents define what your deliverable must achieve — proposals, statements of work, engagement letters, audit protocols, terms of reference. Qrtr reads these to build the list of requirements it will check against.
Reference documents are supporting material you rely on in your work: internal or external standards, policies and guidelines. Qrtr checks that you've used these correctly wherever you cite them.
Drag files onto either area or click to browse. You can skip this step and add documents later from the project's quality profile screen, but a project with no requirement documents has nothing specific to check against.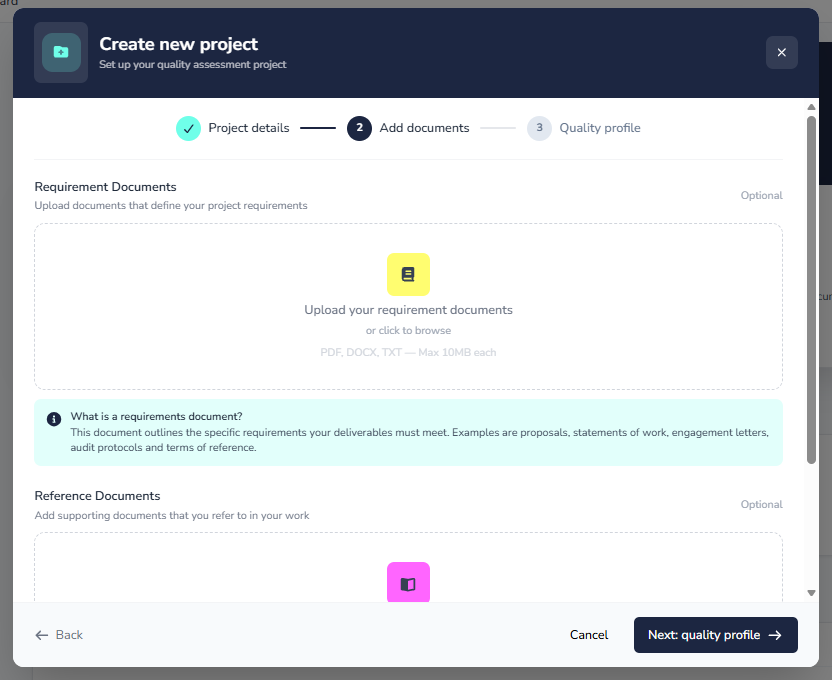
Step 3: Set your quality profile
This step sets the rules for the project. Sensible defaults are already applied, and everything here can be changed later, so don't agonise over it on your first project.
Under Workflow, three toggles control who has to touch a document before it's finished. Review adds a reviewer step before approval. Approval requires a human sign-off to finalise results. External access allows review via an emailed link, which is how you bring in guest reviewers who don't have Qrtr accounts.
Under Scoring, the Pass threshold slider sets the minimum score out of 100 needed to pass a check. Human approval controls whether approval is needed before results can be shared. Email results sets whether check reports go out automatically or by manual send.
Under Distribution, the Qrtr Check Distribution list determines who receives check PDFs when reports are sent from this project. Add a name and email address, then click Add.
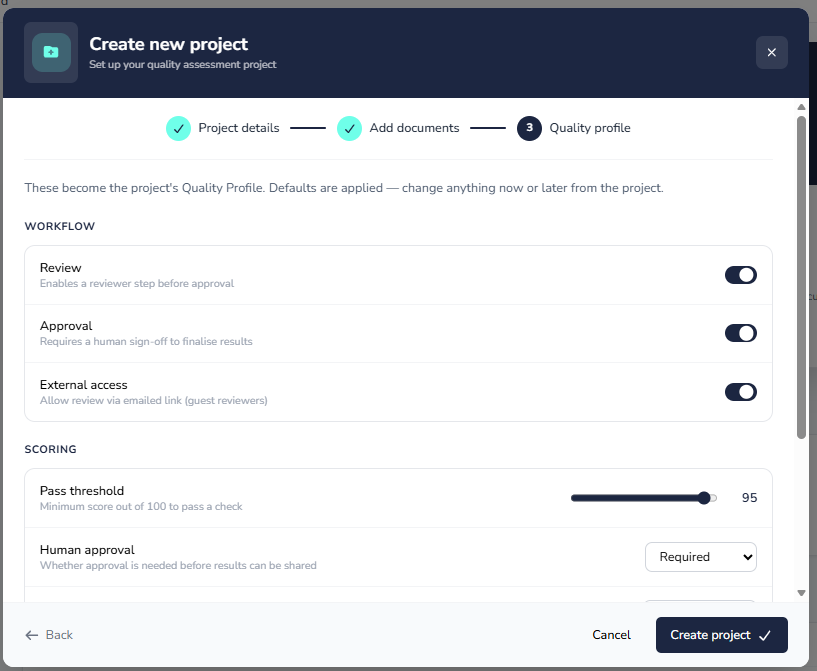
Click Create project. Your project is created and appears under Projects in the left navigation.
Step 4: Run your first Qrtr Check
Click New Check in the left navigation, or Start on the Start a check card on the Home page. The Start a check wizard has two steps.
On step 1, keep Use existing project selected and pick your new project from the Project dropdown. Documents are scored against that project's quality profile. If you'd rather spin up a fresh workspace instead, Create new project does that inline.
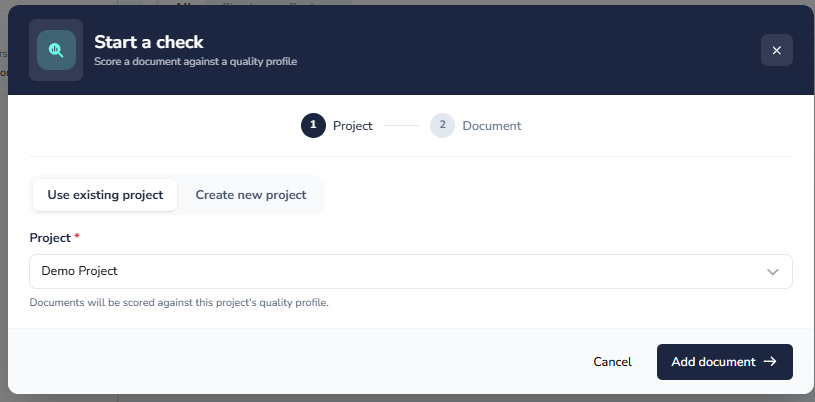
Click Add document, then drag your document onto the upload area or click to browse. Click Run Qrtr check.
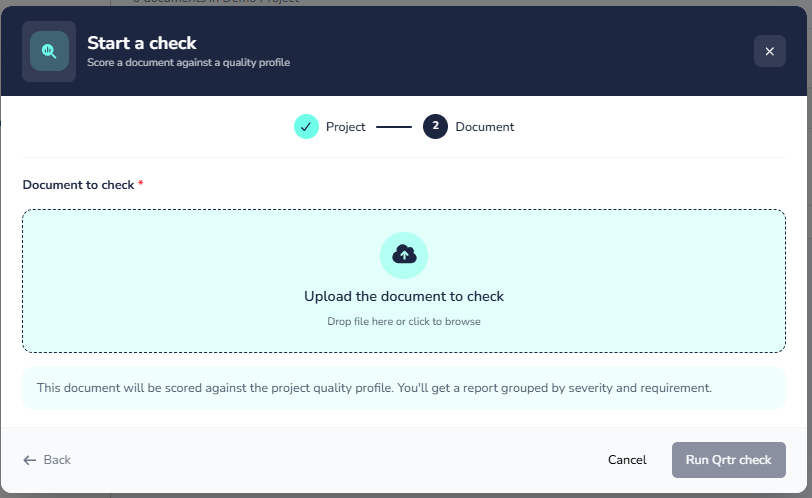
The check runs on its own. You don't need to keep the window open — the result appears in Checks and, if it needs your approval, in What needs your attention on the Home page.
Step 5: Read your results
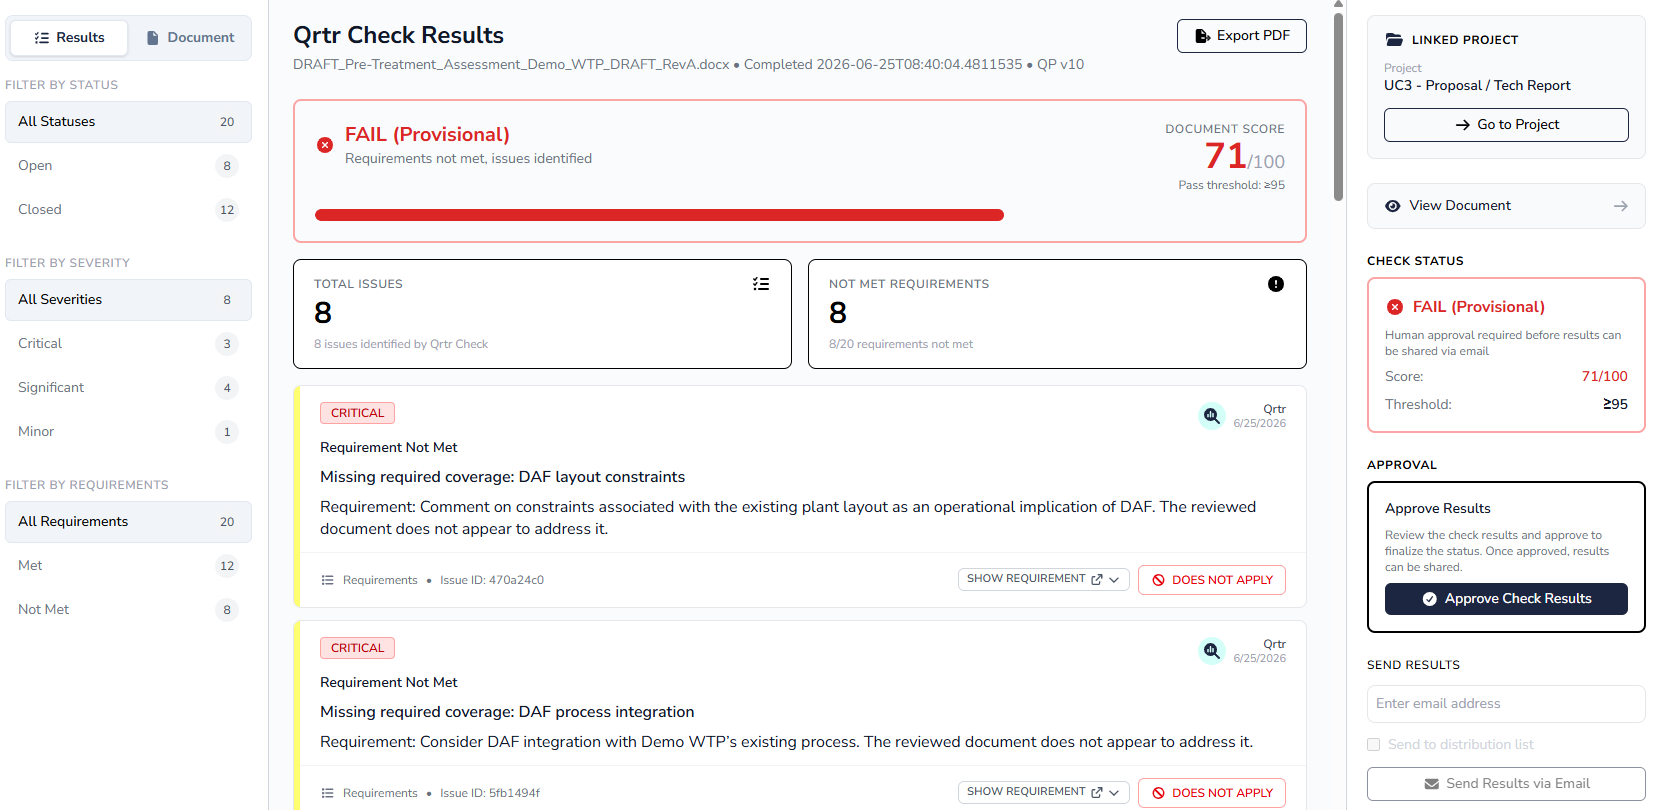
Open the check from Checks, from your project's Outputs list, or from the Home page queue. The Qrtr Check Results screen is built to be worked through top to bottom.
The banner at the top gives the verdict — pass or fail — alongside the document score out of 100 and the pass threshold it was measured against. Two summary tiles show the total issue count and how many requirements were not met.
Below that is the issue list. Every issue carries a severity of Critical, Significant or Minor, the requirement text it relates to, an issue ID, a Show requirement link that takes you to the source, and a Comment field for your notes. The left panel filters the list by status, by severity and by whether requirements were met, which is the fastest way to triage a long report — filter to Critical first.
The right panel shows the linked project, a shortcut to edit the quality profile, and the check status. If your project requires human approval, the result stays Provisional until someone clicks Approve Check Results; only then can it be shared. Beneath that, Send results via email lets you send to a specific address or to the project's distribution list. Export PDF at the top right produces a shareable report, and the Document tab shows the source document itself.
What to do next
If the check surfaced problems, you have two paths. Send the document to a colleague using New Review to assign a reviewer, gather comments and track it through to sign-off. Or fix the issues directly in the document — that work happens in the Qrtr Word add-in rather than in the browser.
Once you're comfortable with the basics, the rest of the left navigation opens up. Projects lists everything with document counts, status and last-updated dates, filterable by Active, Archived and My Projects, and each project page has its own Outputs table plus New check, New review and Edit quality profile buttons. Checks and Reviews are the full historical lists with filters by project, reviewer and approver. Logs is the audit trail of quality events. Insights reports estimated effort saved, what's currently blocked and who's holding it up, with Reassign and Send reminder actions against each stalled item. Admin is where organisation-level settings live.
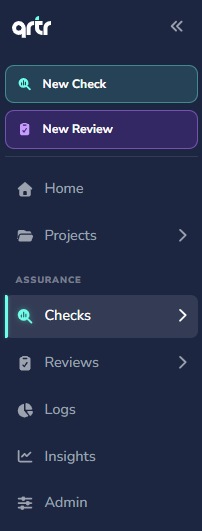
Two small conveniences worth knowing: the star icon beside any project, check or review pins it to Favourites at the bottom of the sidebar, and the « icon at the top collapses the navigation when you want more room.
Your name at the top right opens User Settings, Select Organisation for switching between organisations you belong to, and Sign Out.